Craving Crispy Chicken Cutlets Without the Breading Blues? We’ve Got You Covered!
There’s something undeniably satisfying about a perfectly breaded chicken cutlet. That golden-brown, crispy exterior gives way to juicy, tender chicken inside – a culinary dream come true. But oh, the frustration! All too often, that beautiful breading decides to take a vacation halfway through cooking, leaving you with a naked, unappetizing chicken cutlet. Fear not, fellow chicken enthusiasts! This comprehensive guide will equip you with the knowledge and techniques to achieve breaded chicken cutlet perfection, every single time.
How to Make Chicken Cutlets Without Breading Falling Off?
Ah, the golden dream: crispy breaded chicken cutlets. But sometimes, reality sets in – the beautiful breading detaches, leaving you with a naked, unappetizing chicken cutlet. Fear not, breaded chicken enthusiasts! This guide is your roadmap to breaded chicken cutlet bliss. We’ll crack the code on achieving that coveted crispy exterior, every single time. Here’s the good news: it’s all about understanding some simple science and mastering a few key techniques. From properly prepping the chicken to using the right breading sequence, we’ll unveil the secrets to flawless adhesion. So, ditch the frustration and get ready to enjoy perfectly breaded chicken cutlets that are the undisputed stars of the dinner table.
The Science Behind Breading Adhesion
Before we dive into the how-to, let’s take a quick peek behind the curtain and understand the science of what makes breading stick. It all boils down to two key factors: moisture and surface area.
Moisture Matters: Think of moisture as the enemy of a good breading bond. Excess water on the chicken’s surface acts like a barrier, preventing the flour (our first layer) from adhering properly. Imagine trying to stick a label to a wet surface – it just won’t hold. This slippery situation continues with the egg wash, which relies on the flour for a good grip. Too much moisture in the egg wash itself can also lead to a slippery mess, causing the breading to slide right off during frying.
Surface Area: The More, the Merrier: Now, let’s talk about surface area. The more textured the chicken’s surface, the more grip the breading has. Think of it like Velcro – the more hooks and loops there are, the stronger the connection. A smooth, unpounded chicken cutlet offers a minimal surface area for the breading to cling to, making it more likely to detach during cooking.
By understanding these two factors, we can adjust our approach and create the perfect conditions for flawless breading adhesion. For those of you who like to get technical, this phenomenon relates to the concept of surface tension and intermolecular forces. But fear not, the practical tips coming up will ensure breaded chicken cutlet success without needing a science degree!
The Perfect Breading Process
Prepping the Chicken for Flawless Breading
Before we get down to the fun part of coating our chicken in a crispy wonderland, let’s talk about prepping the star of the show: the chicken itself. Here, we’ll lay the foundation for perfect breading adhesion.
Patting Down for Success: Why Moisture Matters
Remember that moisture villain we discussed earlier? Here’s where we banish it from the kingdom! Thoroughly drying your chicken cutlets with paper towels is absolutely crucial. Excess moisture acts like a slippery shield, preventing the flour (our first layer of breading) from establishing a good bond. Imagine trying to stick a label on a wet surface – it just won’t hold. The same principle applies to our chicken. So, grab those paper towels and pat, pat, pat until your chicken cutlets are nice and dry.
Pounding for Perfection: Even Thickness Matters
Pounding your chicken cutlets to an even thickness might seem like an extra step, but trust us, it’s a game-changer for even cooking and flawless breading. Uneven thickness can lead to hot spots during frying, with some parts overcooked and others undercooked. Additionally, a thicker section might not adhere to the breading as well, creating a potential weak spot for it to detach.
Here’s the pounding lowdown: Place your chicken cutlets between two sheets of plastic wrap. Using a meat mallet or the bottom of a heavy saucepan, gently pound the chicken until it’s about ¼-inch thick. Remember, we’re not pulverizing it – just achieving a uniform thickness.
Seasoning for Flavor: Don’t Skimp on Spices
Now that your chicken is prepped and ready, let’s not forget about flavor! Seasoning your chicken cutlets generously with salt and pepper before breading is a simple step that packs a big punch. Seasoning not only enhances the surface flavor of the chicken but also helps draw out some moisture, further aiding in breading adhesion. Feel free to get creative with your spices! A pinch of paprika, a dash of garlic powder, or a sprinkle of your favorite Italian seasoning can add another layer of deliciousness.
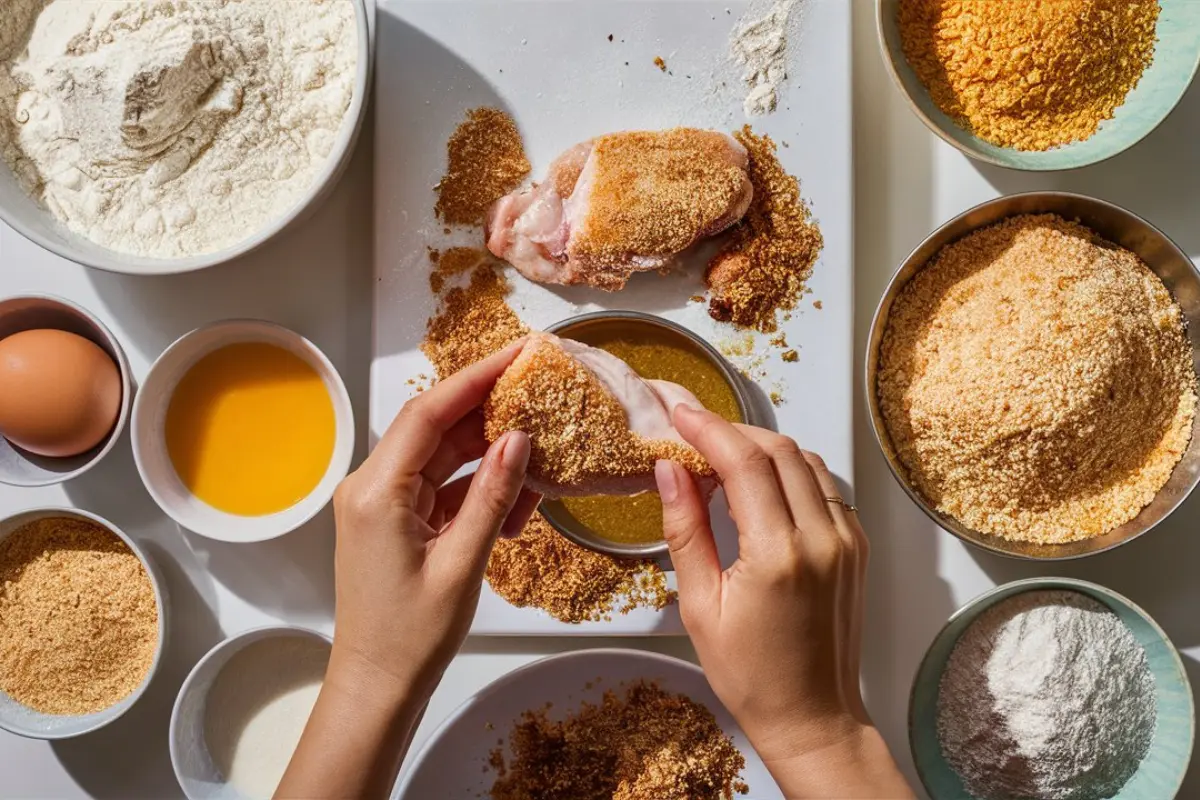
The Breading Trio: Flour, Egg, and Coating
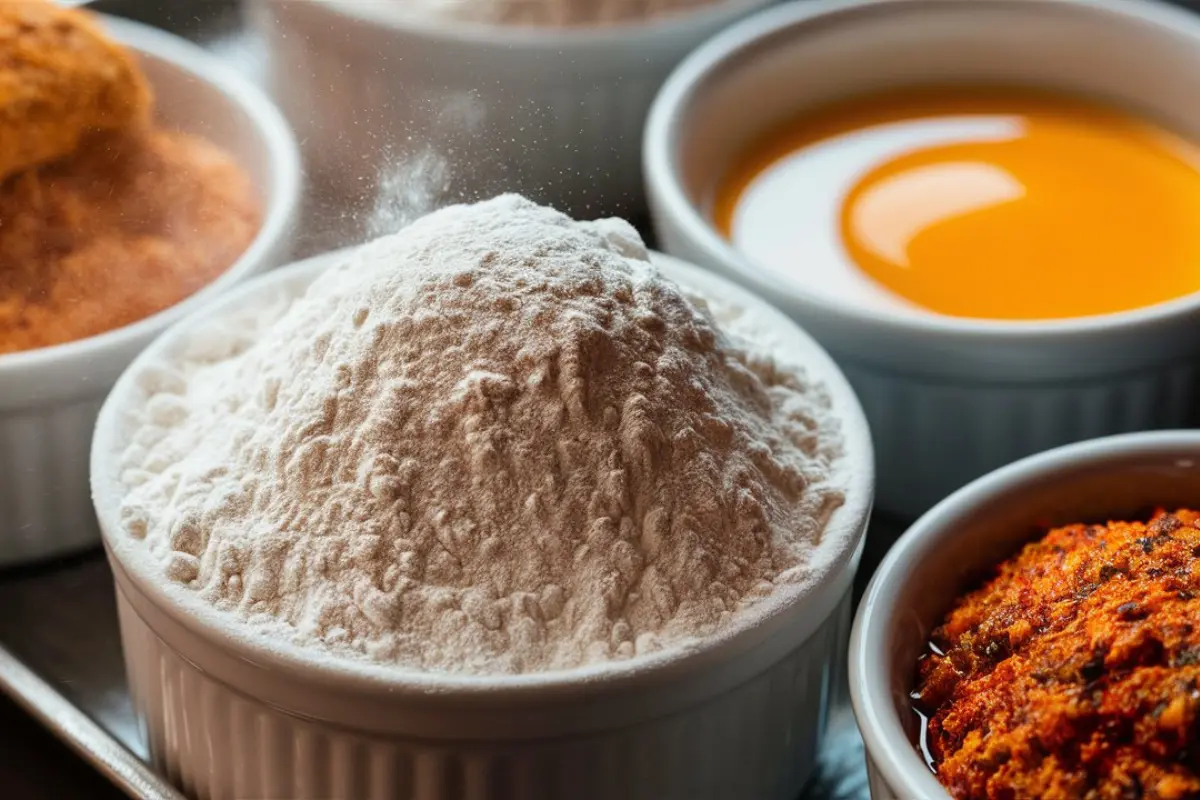
Now it’s time to assemble the holy trinity of perfect breaded chicken cutlets: flour, egg wash, and your chosen coating.
The First Layer: The Power of Flour
The humble flour might seem like a simple step, but it plays a critical role. The flour acts as the base coat, providing a surface for the egg wash and breadcrumbs to adhere to. Think of it like a primer for a painting – it creates a sticky foundation for the subsequent layers to cling to. You can use all-purpose flour for a classic result, or for an added flavor boost, consider seasoned flour blends with herbs and spices.
The Second Layer: The Binding Power of Egg Wash
The egg wash acts as the glue that holds everything together. Whisk together beaten eggs with a splash of water or milk to create a thin, even consistency. Dip your floured chicken cutlet into the egg wash, ensuring it’s completely coated. Here’s a tip: letting any excess egg wash drip off for a few seconds before moving on to the next step helps prevent a gloopy breading.
While the classic egg wash works wonders, you can also experiment with buttermilk or yogurt for added tenderness. These options have a slightly thicker consistency and can introduce a subtle tangy flavor to your chicken cutlets.
The Third Layer: The Crunchy Choice – Breadcrumbs, Panko, or Something Else?
This is where you get to unleash your creativity and choose your crispy coating! Here are some popular options, each offering a unique texture:
- Breadcrumbs: The classic choice, offering a fine and evenly textured crunch.
- Panko: These Japanese breadcrumbs boast a lighter, airier texture with a satisfying crunch.
- Crushed Crackers: For a bolder flavor, consider crushing your favorite crackers for a delightfully coarse and flavorful coating.
- Cornflakes: Believe it or not, crushed cornflakes offer a surprisingly light and crispy option with a hint of sweetness.
For those who crave ultimate crispness, there’s a technique called double dredging. Here’s how it goes: After dipping your chicken in the egg wash, dredge it back through the flour one more time before applying your final coating of breadcrumbs or your chosen option. This extra layer of flour creates a thicker barrier, resulting in an even crispier exterior.
Pro Tip: For a truly professional touch, place your breaded chicken cutlets on a wire rack set over a baking sheet. This allows for air circulation and prevents the breading from getting soggy while waiting to be cooked. Now that your perfectly prepped and breaded chicken cutlets are ready, we’ll delve into the art of achieving that golden-fried perfection in Part 4: Cooking Like a Pro.
Cooking Techniques for Breading Success
Let the Breading Set: The Power of Chilling
We’ve meticulously prepped and breaded our chicken cutlets – the finish line is in sight! But before diving straight into the hot oil, there’s one crucial step often overlooked: chilling. Taking the time to chill your breaded chicken cutlets allows the magic of breading adhesion to truly work its wonders.
Think of chilling as the setting process for glue. As the breaded chicken sits in the refrigerator, the flour hydrates slightly, creating a stronger bond with the egg wash and ultimately, the crispy coating. This translates to less breading detachment during cooking, leaving you with perfectly breaded chicken cutlets. Aim for a chilling time of 30 minutes to an hour. Any longer, and the breading might become too dry, affecting the final texture.
Choosing the Right Oil and Maintaining Temperature
Now, let’s get cooking! When it comes to frying your breaded chicken cutlets, choosing the right oil is key. opt for neutral-flavored oils with high smoke points, such as canola or peanut oil. These oils can withstand high temperatures without burning, ensuring your chicken cooks through without the oil imparting any unwanted flavors.
Temperature is another crucial factor. Maintaining a consistent oil temperature of around 350°F is essential for even cooking and perfect crispness. Oil that’s too hot will cause the breading to burn before the chicken cooks through, while oil that’s too cool will result in greasy, soggy cutlets. Consider using a deep-fry thermometer for precise temperature control.
Gentle Handling: Avoid Breading Disruption
Here comes the moment of truth: introducing your breaded beauties to the hot oil. Gently transfer your chicken cutlets to the pan using a slotted spoon. Avoid overcrowding the pan, and resist the urge to prod or poke the chicken while it cooks. This can disrupt the delicate breading, so let the oil do its work!
Don’t Overcrowd the Pan: Maintaining Space
Overcrowding the pan is a recipe for disaster (pun intended!). When the pan is crammed with chicken, the oil temperature can drop significantly, leading to uneven cooking and, yes, you guessed it – breading detachment. Fry your chicken cutlets in batches if necessary, ensuring there’s enough space for them to cook freely without bumping into each other.
Troubleshooting Common Breading Issues
Why Does My Breading Fall Off? Identifying the Culprit
Ah, the dreaded breading detachment! It happens to the best of us, but fear not, for most of the time, the culprit is easily identifiable and fixable. Let’s delve into the common reasons why breading might take a vacation from your chicken cutlets:
Excess Moisture: The Sneaky Enemy
Remember that moisture villain we discussed earlier? It can resurface at any stage! Excess moisture on the chicken’s surface acts like a barrier, preventing the flour (our first layer) from adhering properly. Make sure you pat your chicken cutlets thoroughly with paper towels before dredging them in flour. Think of it this way: a dry surface creates a strong foundation for the breading to cling to.
The Slippery Egg Wash: Finding the Right Balance
The egg wash acts as the glue that holds everything together, but too much of a good thing can backfire. An egg wash that’s too runny or liquid can be too slippery, causing the breading to slide off during frying. Aim for a thin, even consistency. Whisk your eggs together with just a splash of water or milk, and let any excess egg wash drip off the chicken before moving on to the next step.
The Wrong Coating Choice: Selecting the Right Texture
While all the options we discussed (breadcrumbs, panko, crushed crackers, etc.) offer a delicious crunch, they don’t all have the same grip. Fine breadcrumbs, for example, might not adhere as well as their coarser counterparts like panko or crushed crackers. If you’re struggling with breading detachment, consider opting for a coating with a bit more texture for better adhesion.
Skipping the Chill: The Importance of Patience
Remember that magical chilling step we mentioned? It’s not just about patience, it’s about science! Chilling allows the breading to set and adhere better. As the breaded chicken sits in the refrigerator, the flour hydrates slightly, creating a stronger bond with the egg wash and the coating. So, resist the urge to skip this crucial step!
Fixing Breaded Mishaps: Solutions for Each Problem
Now that we’ve identified the potential culprits, let’s get down to solutions! Here’s a quick fix guide for each breading issue:
- Excess Moisture: Pat your chicken cutlets even more thoroughly with paper towels.
- Slippery Egg Wash: Adjust your egg wash consistency by adding a touch more whisked egg if needed, or simply letting more excess drip off before coating.
- Wrong Coating Choice: Opt for a coating with a coarser texture like panko or crushed crackers for better adhesion.
- Skipping the Chill: Don’t skip the chilling step! Aim for at least 30 minutes to an hour of chilling time for optimal breading adhesion.
Exploring Alternatives: Breading Beyond the Basics
While the classic flour-egg-breadcrumb combo reigns supreme, the world of chicken cutlet coatings is vast and exciting! Let’s venture beyond the basics and explore some alternative options that will tantalize your taste buds and add a touch of culinary flair to your breaded chicken creations.
-
Tempura Batter: This light and airy Japanese batter creates a delicate, lacy crust on your chicken cutlets. Made with cold water, flour, and an egg yolk, tempura batter fries up light and crispy, without overwhelming the chicken’s natural flavor.
-
Coconut Flour: For a gluten-free and healthy twist, consider using coconut flour as your coating. Coconut flour offers a unique nutty flavor and a satisfyingly crisp texture. Pair it with a squeeze of lime and a sprinkle of fresh cilantro for a Caribbean-inspired twist.
-
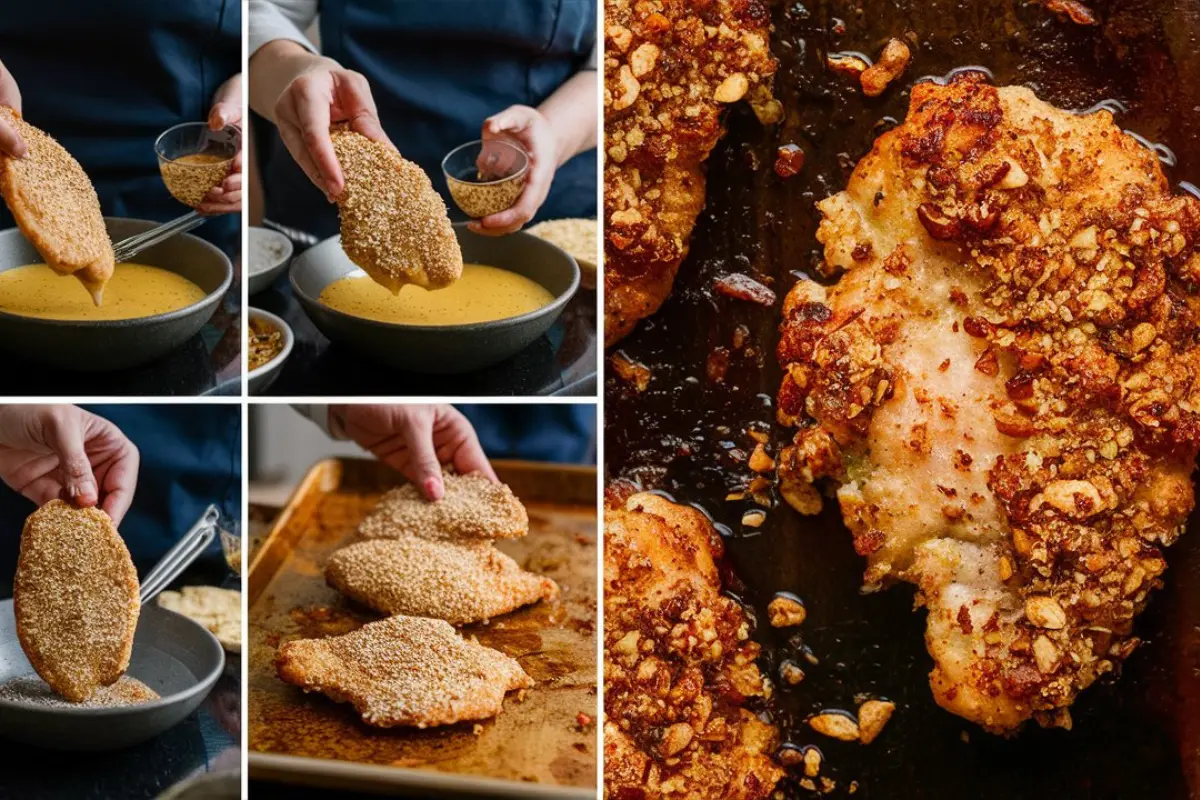
Crushed Nuts: For a luxurious and flavorful option, try coating your chicken cutlets in crushed nuts like almonds, pecans, or walnuts. The rich nuttiness adds a delightful textural contrast to the juicy chicken, making each bite a flavor explosion. Experiment with different nut combinations or add a touch of chopped herbs for an extra flavor dimension.
FAQs About Breaded Chicken Cutlets
We’ve covered the science, the techniques, and the troubleshooting tips – but there might still be a few lingering questions. Fear not, this FAQ section is here to set your mind at ease and ensure breaded chicken cutlet success!
Can I bake chicken cutlets instead of frying?
Absolutely! For a healthier alternative, you can definitely bake your breaded chicken cutlets. Here’s the key: use a higher oven temperature (around 400°F) to achieve a crispy exterior. To prevent the breading from getting soggy, preheat your baking sheet in the oven for a few minutes before placing your breaded chicken on it.
What temperature should I cook the chicken to?
For safe consumption, your cooked chicken cutlets should reach an internal temperature of 165°F. Use a meat thermometer to check the temperature in the thickest part of the chicken to ensure it’s cooked through.
How can I reheat leftover breaded chicken cutlets?
The key to reheating leftover breaded chicken cutlets is maintaining that crispy perfection. Reheating in your oven or toaster oven at a moderate temperature (around 350°F) is the way to go. This allows the chicken to warm through gently without compromising the crispness of the breading.
What can I do with leftover breaded chicken?
Don’t relegate your leftover breaded chicken to a sad sandwich! Get creative! Diced breaded chicken can add a delightful crunch to salads, wraps, or even pasta dishes. Thinly sliced leftover chicken can be used to elevate a classic chicken Caesar salad. And for a comforting and hearty option, consider using leftover breaded chicken in a homemade chicken pot pie
Conclusion: Conquer Breaded Chicken Cutlets with Confidence!
There you have it! With these insights, you’re well on your way to becoming a breaded chicken cutlet connoisseur. Remember, the key lies in proper preparation. Patting your chicken dry, using the right breading technique with a focus on chilling, and maintaining a consistent oil temperature during cooking are all crucial steps for achieving that coveted crispy exterior.
Don’t be afraid to troubleshoot! Understanding the reasons behind breading mishaps empowers you to fix them with ease. Finally, remember that the fun lies in experimentation. Explore different breading options, seasonings, and flavors to create breaded chicken cutlets that are uniquely yours.
So, ditch the frustration and embrace the joy of crispy, perfectly breaded chicken cutlets. With these tips and tricks, you’ll be serving up restaurant-worthy results in no time, leaving your loved ones asking for seconds (and maybe even thirds!).