Craving a Delicious Dessert? Look No Further Than the Philadelphia No-Bake Cheesecake!
Craving a delicious cheesecake but short on time? Look no further than this easy No-Bake Cheesecake Recipe! This recipe is perfect for beginner bakers and busy schedules, allowing you to whip up a restaurant-worthy dessert in the comfort of your own home. With its simple ingredients and straightforward process, you’ll be boasting about your cheesecake-making skills in no time.
Imagine a creamy, dreamy cheesecake that requires no preheating the oven – sounds too good to be true, right? Well, the Philadelphia No-Bake Cheesecake turns that fantasy into reality. This delightful dessert is a testament to the versatility of Philadelphia cream cheese, transforming it into a decadent treat that’s perfect for any occasion.
Why Choose a No-Bake Cheesecake?
Let’s face it, baking can be intimidating, especially on hot summer days. No-bake cheesecakes, however, offer a cool and refreshing alternative. They’re incredibly easy to prepare, requiring minimal ingredients and absolutely no oven time. Simply whip up the filling, assemble the crust, and let the fridge do its magic. In no time, you’ll have a restaurant-worthy cheesecake ready to impress your guests.
A Perfect Dessert for All Occasions
The beauty of the Philadelphia No-Bake Cheesecake lies in its adaptability. It’s the perfect centerpiece for a festive gathering, a delightful addition to a potluck, or a simply satisfying weekend treat. Moreover, it’s incredibly customizable, allowing you to explore endless flavor combinations and toppings to suit your taste buds.
Get ready to dive into the world of no-bake cheesecakes! Next, in the following section, we’ll unveil the secrets behind the classic Philadelphia No-Bake Cheesecake recipe, complete with a step-by-step guide and helpful tips.
The Classic Philadelphia No-Bake Cheesecake
Now that you’re convinced of the magic of no-bake cheesecakes, let’s get down to business! This section unveils the secrets behind the classic Philadelphia Cheesecake. We’ll provide a detailed breakdown of the ingredients and equipment you’ll need, followed by a step-by-step guide that will have you assembling this delightful dessert with confidence.
Ingredients & Equipment Breakdown
Here’s what you’ll need to create your masterpiece:
- For the Crust:
- 1 ½ cups graham cracker crumbs (store-bought or homemade)
- ¼ cup granulated sugar
- ½ cup unsalted butter, melted
- For the Filling:
- 3 (8 oz) packages Philadelphia cream cheese, softened to room temperature
- ¾ cup powdered sugar
- ½ teaspoon vanilla extract
- ¼ cup lemon juice
- 1 cup heavy whipping cream, cold
Equipment:
- Mixing bowls (various sizes)
- Electric mixer (handheld or stand mixer)
- Rubber spatula
- 9-inch springform pan
- Parchment paper
Step-by-Step Guide with Photos
-
Prepare the Crust:
- In a medium bowl, combine the graham cracker crumbs and sugar.
- Drizzle in the melted butter and mix well until the crumbs are evenly coated.
- Press the mixture firmly into the bottom of your greased springform pan. You can use the back of a spoon or a measuring cup to achieve an even and compact crust. Tip: Chilling the crust in the refrigerator for 15 minutes before adding the filling helps it set nicely.
-
Whip Up the Creamy Filling:
- In a large mixing bowl, using your electric mixer on medium speed, beat the softened cream cheese until smooth and creamy. There should be no lumps.
-
Sweeten and Flavor:
- Gradually add the powdered sugar to the cream cheese mixture, beating on low speed until just combined. Scrape down the sides of the bowl as needed to ensure even mixing.
- Stir in the vanilla extract and lemon juice until fully incorporated.
-
Incorporate the Whipped Cream:
- In a separate bowl, whip the cold heavy cream to stiff peaks using your electric mixer on high speed. Tip: For perfectly whipped cream, ensure your bowl and cream are nice and cold.
- Gently fold the whipped cream into the cream cheese mixture using a rubber spatula. Be careful not to overmix, as you want to maintain a light and airy texture.
-
Assemble and Chill:
- Pour the cheesecake filling over the prepared graham cracker crust.
- Use a spatula to smooth the top for a clean finish.
- Cover the cheesecake loosely with plastic wrap and refrigerate for at least 4 hours, or ideally overnight, to allow it to set completely.
Tips & Tricks for Success
Achieving Room Temperature Cream Cheese: Patience is key! Don’t resort to microwaving the cream cheese, as that can lead to lumps. Instead, take the cream cheese out of the refrigerator an hour or two before you start baking to allow it to soften naturally.
Setting the Crust: Pre-chilling the crust for 15 minutes before adding the filling helps it firm up and prevents a soggy bottom.
Smooth and Creamy Filling: Beating the cream cheese for a sufficient amount of time ensures a smooth and lump-free texture in your final cheesecake.
Folding in the Whipped Cream: Gently fold the whipped cream into the filling to maintain its airiness. Overmixing can deflate the cream and result in a denser cheesecake.
Removing the Cheesecake from the Pan: Run a warm knife around the edge of the cheesecake before attempting to remove it from the springform pan. This helps to loosen the cheesecake and prevent cracking.
Looking for a reference on how to whip cream? Check out this helpful guide on [How to Whip Cream](link to a wikihow on whipping cream – not commercially affiliated).
By following these simple steps and incorporating these handy tips, you’ll be well on your way to creating a restaurant-worthy Philadelphia No-Bake Cheesecake! Transitioning smoothly, let’s explore some exciting flavor variations in the next section to take your cheesecake game to the next level. We’ll show you how to add a delightful twist to the classic recipe, creating a flavor explosion in every bite.
Flavor Variations for Your Philadelphia No-Bake Cheesecake
Beyond the Classic: Explore Delicious Flavors
The beauty of the Philadelphia No-Bake Cheesecake lies in its versatility. While the classic recipe is undeniably delightful, why not experiment with a flavor twist? By incorporating various ingredients into the filling, you can create a symphony of tastes that will tantalize your palate. So, unleash your inner chef and get ready to explore a world of delicious possibilities!
Popular Flavor Twists
Here are some popular flavor variations to inspire your next no-bake cheesecake creation:
-
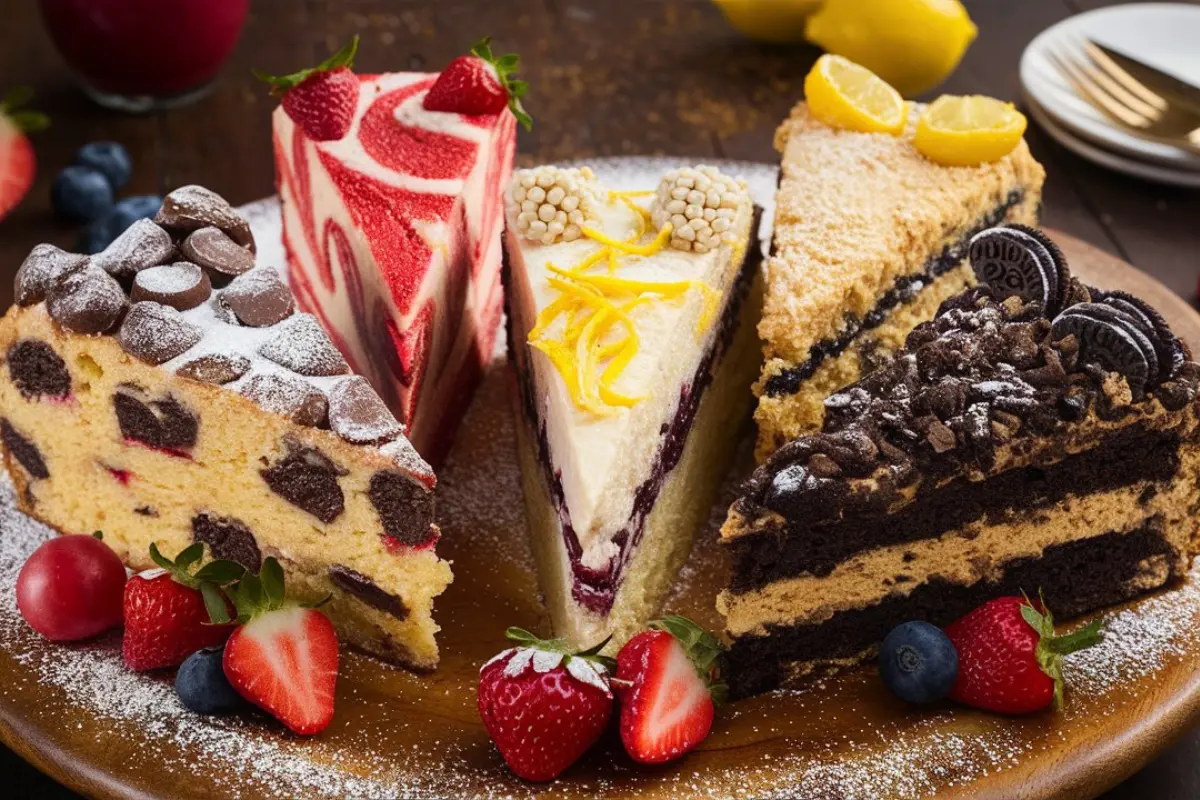
Chocolate Chip Delight: Chocolate lovers, rejoice! For a decadent twist on the classic recipe, simply fold in 1 cup of semi-sweet chocolate chips into the cheesecake filling after incorporating the whipped cream. You can even sprinkle some additional chocolate chips on top before chilling for an extra chocolatey punch.
-
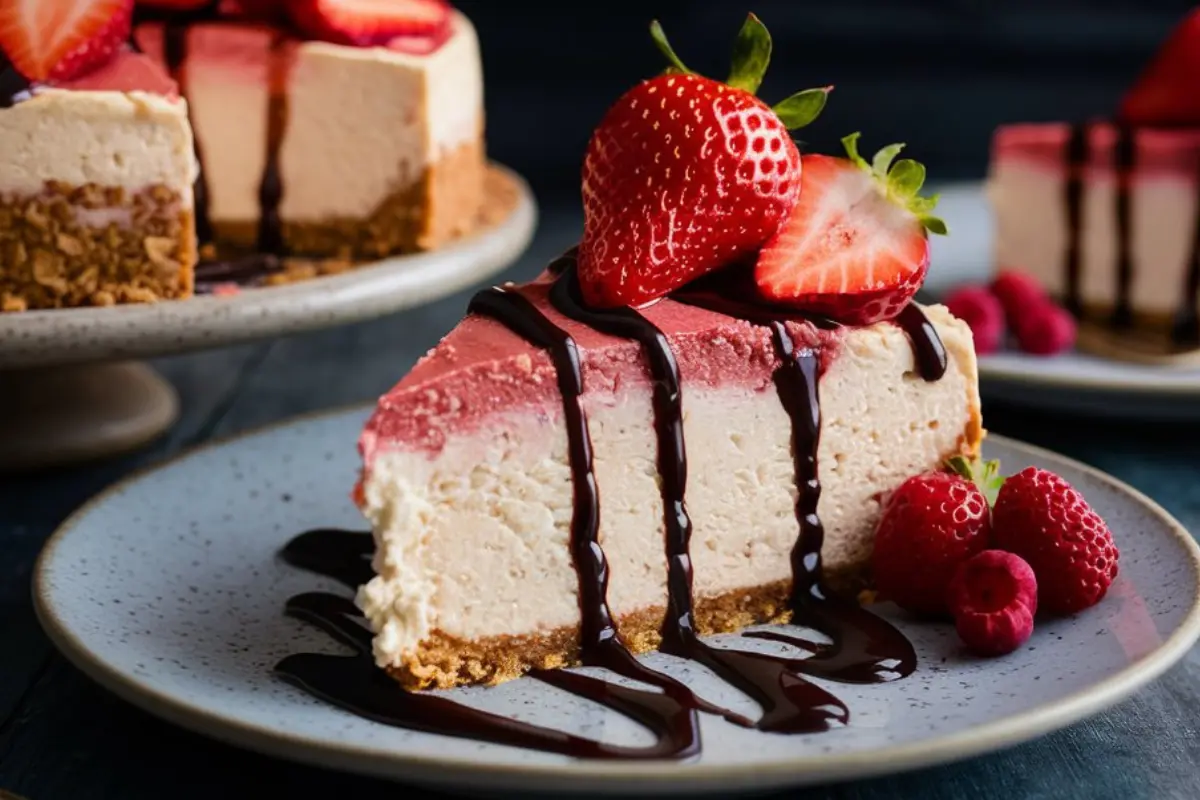
Strawberry Swirl Sensation: Looking for a burst of fruity freshness? This variation is perfect for you! Puree ½ cup of fresh strawberries until smooth. Gently fold half of the cheesecake filling into a separate bowl and swirl in the strawberry puree. Then, pour the vanilla cheesecake filling and the strawberry mixture alternately into the prepared crust, creating a beautiful marbled effect. Refrigerate as usual and prepare to be wowed!
-
Lemon Zest Lusciousness: For a delightful citrusy twist, add the zest of 1 lemon along with the vanilla extract and lemon juice in the classic recipe. The subtle lemon flavor perfectly complements the creamy cheesecake filling, creating a refreshingly light dessert.
-
Peanut Butter Paradise: Calling all peanut butter fans! For this flavor explosion, substitute ½ cup of the cream cheese in the filling with creamy peanut butter. Be sure to beat the peanut butter into the softened cream cheese until well incorporated. For an extra peanut butter punch, drizzle some melted chocolate or caramel sauce over the top of the finished cheesecake.
-
Oreo Cookie Craze: Oreo cookies and cheesecake? Yes, please! This variation is a guaranteed crowd-pleaser. Pulse 15 Oreo cookies (without the centers) in a food processor to create a fine crumb. Press half of the Oreo crumb mixture into the bottom of your crust. Then, fold the remaining cookie crumbs into the cheesecake filling along with the whipped cream. Top the finished cheesecake with the remaining Oreo crumb mixture for an impressive presentation.
A Few Notes on Recipe Variations:
These are just a starting point to inspire your creativity! Feel free to experiment with different flavors and ingredients. When adding mix-ins like chocolate chips or fruit purees, it’s important to ensure they are well incorporated without over-mixing the filling. Additionally, be mindful of the amount of additional ingredients you incorporate, as this can affect the overall setting of the cheesecake.
Topping Ideas for Your Philadelphia No-Bake Cheesecake
Elevate Your Creation: Explore Delicious Toppings
Your Philadelphia No-Bake Cheesecake is a masterpiece in itself, but why not take it to the next level? Adding a delightful topping can elevate both the flavor and presentation of your dessert. Think of it as the finishing touch that transforms your cheesecake from simply delicious to show-stopping!
Inspiration for the Perfect Finish
The world of cheesecake toppings is vast and exciting. Here are some inspirational ideas to get your creative juices flowing:
-
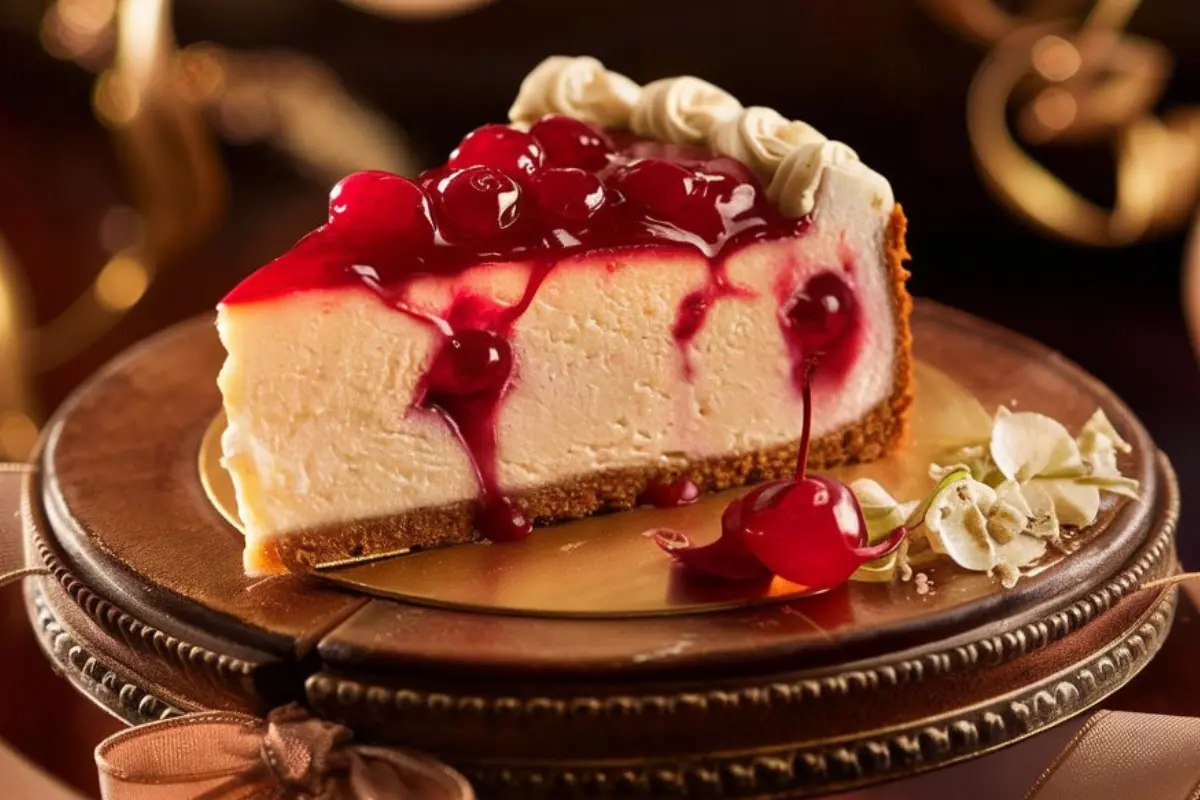
Fresh Fruit Fantasia: Fresh fruit is a classic and refreshing cheesecake topping. Berries of all kinds (strawberries, raspberries, blueberries), sliced kiwi, or diced mango are all perfect choices. You can arrange the fruit in a beautiful pattern on top of the cheesecake, or create a simple fruit compote for a burst of flavor.
-
Whipped Cream Cloud: For a touch of lightness and sweetness, a dollop of whipped cream is never a bad idea. Pipe whipped cream rosettes around the edge of the cheesecake, or spread a fluffy layer over the top for a creamy, dreamy finish.
-
Chocolate Ganache Decadence: Chocolate lovers, rejoice! A rich chocolate ganache poured over the cheesecake creates a truly decadent experience. To make a simple ganache, heat some heavy cream until simmering, then pour it over chopped chocolate and let it sit for a few minutes. Whisk until smooth and pour over the chilled cheesecake.
-
Caramel Sauce Drizzle: The sweet and salty combination of caramel sauce and cheesecake is a match made in heaven. Drizzle store-bought caramel sauce over the top of your cheesecake, or make your own for an extra special touch.
-
Crushed Cookie Crumble: For a textural contrast and a burst of flavor, crushed cookies are a fantastic topping option. Pulse your favorite cookies (Oreos, graham crackers, or even biscoff cookies) in a food processor to create a fine crumb, then sprinkle it generously over the top of the cheesecake.

FAQs: All Your Philadelphia No-Bake Cheesecake Questions Answered
Now that you’re armed with the knowledge to create a restaurant-worthy Philadelphia No-Bake Cheesecake, you might have some lingering questions. Fear not! This FAQ section is here to address some of the most common queries and ensure your cheesecake-making journey is a smooth and successful one.
Can I use a different brand of cream cheese?
While Philadelphia cream cheese is the classic choice, you can certainly use other brands of cream cheese in your no-bake cheesecake. Just be sure to use a full-fat cream cheese block, not a spreadable tub or whipped cream cheese variety. opt for a brand known for its creaminess to achieve the best texture in your final cheesecake.
How long does a no-bake cheesecake last?
Once your Philadelphia No-Bake Cheesecake has set completely, you can store it in the refrigerator for up to 5 days. To maintain optimal freshness, cover the cheesecake loosely with plastic wrap to prevent it from drying out.
Can I freeze a no-bake cheesecake?
Absolutely! Freezing is a great way to enjoy your cheesecake at a later date. To freeze, let the cheesecake set completely in the refrigerator. Then, wrap it tightly in plastic wrap and place it in a freezer-safe container. The cheesecake will keep for up to 2 months in the freezer. Thaw the cheesecake overnight in the refrigerator before serving.
My cheesecake isn’t setting! What went wrong?
There are a couple of reasons why your cheesecake might not be setting properly. The most common culprit is not using room temperature cream cheese. Cold cream cheese won’t incorporate air well, leading to a dense and potentially runny cheesecake. Secondly, ensure your whipped cream is stiff enough before folding it into the filling. Over-mixing the filling can also deflate the air bubbles and hinder setting.
Is there a gluten-free crust option?
Absolutely! For a gluten-free crust, simply substitute the graham cracker crumbs in the recipe with a gluten-free alternative. Ground almond flour, crushed nuts, or even a homemade oat flour crumble are all excellent options to create a delicious and structurally sound crust for your gluten-free cheesecake.
Conclusion
The Beauty of Simplicity: A No-Bake Delight
The Philadelphia No-Bake Cheesecake is a testament to the fact that delicious desserts don’t require complicated techniques. With its simple ingredients and straightforward process, this recipe empowers you to create a restaurant-worthy dessert in the comfort of your own home.
Embrace Your Inner Pastry Chef
In short, what are you waiting for? Grab your ingredients, unleash your creativity, and embark on a delicious journey of cheesecake exploration! We’ve provided you with the classic recipe, inspiring flavor variations, and topping ideas, but don’t be afraid to experiment and personalize your cheesecake. After all, baking is an art form, and the only limit is your imagination. Happy baking!